Using Photoshop Actions to Optimize an entire Image Folder
WordPress and web developers often find themselves dealing with a large folder of images they need to optimize but are unsure how, and the process of going through each one individually is daunting. Well, as a solution you can use Photoshop to optimize an image folder with the same settings you apply to a single image, all at once.
I’ve used Photoshop since version 4.01 and still don’t know all of the features. And only lately did I discover the power of Actions. Large images can affect your page ranking, and if you’ve not carefully optimized your images, you could be putting people on long hold times, including search robots, and neither of them like it.
Here’s a quick and easy tutorial for making an Action in Photoshop CS6, and using Batch to run the action on an entire folder.
Let’s get started!
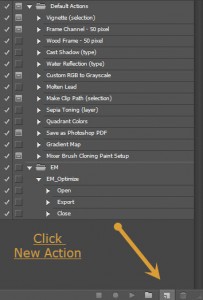
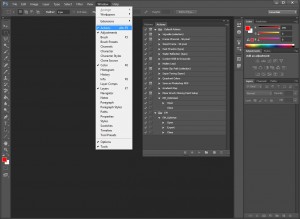
2. In the Actions panel, click the icon for New Action. You can also group your actions into folders if you like, similar to grouping layers.
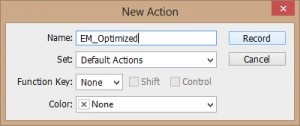
3. Give your action a unique name. If you create a group set, it will appear here as a location to keep your new action. Name it according to whatever you’re doing to the image, whether optimizing or filtering in some way. Photoshop is just going to watch and record everything you do and the settings you choose.
And it’s not on a timer, liking taking a screen capture video. So if you sit there and think for a moment it’s fine. Photoshop just waits for you to do something.
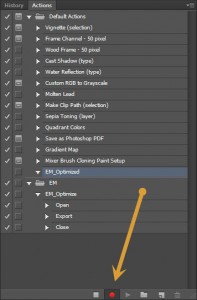
4. After you click record in the previous dialogue window, you’re recording! Photoshop is waiting for you to do something. The first command you’re going to record is the “Open” command.
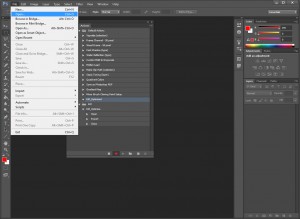
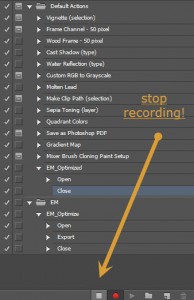
5. Open one of the files you want to optimize. That’s all we’ll do in this tutorial, to keep it quick.
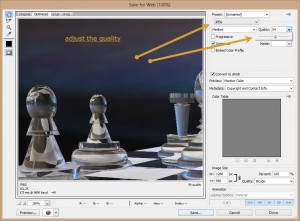
7. Adjust the file type and/or quality to reduce your image footprint. Remember, you’re not rescaling anything that might mess up your layout. You’re just stripping out color and definition data. You will discover how you can make even the largest, full-screen images load really fast. Photoshop will remember these settings you use and save it as part of the Action we’re making. Click Save when ready.
As a side note: If you choose to Replace a file during the Save process, Photoshop will remember the action and do the same for subsequent files. You also have a lot of control in the Batch dialogue window.
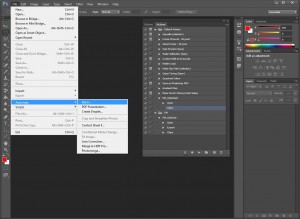
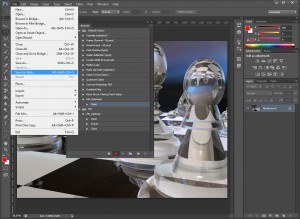
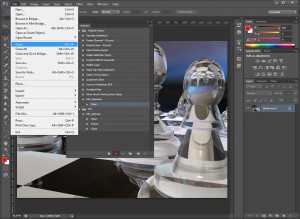
10. It’s not very intuitive yet, but you access your Actions through the Batch window, under Automate (File -> Automate -> Batch).

11. This is where you select the Action you just made, and apply it to an entire folder structure if required. You can choose any sets you make (groups), and your actions. Choose your optimize action and the folders to act upon, and Photoshop will do the rest. You can just sit back and watch as Photoshop opens each of your images and quickly processes and closes them. It’s kinda cool!
One note on this step: Photoshop seems to keep one example image open while it processes and second image, and it switches between the two. This can make it appear as if it’s continually opening an old image. If you watch closely, you’ll see how one of the two or more images are changing.
This is the end of this tutorial.
Hopefully this helped you learn a little more about Photoshop’s Actions. The file conversion features alone provide you with enormous options, only limited by your imagination.

